This week in CEP 811 I had to use my Makey Makey kit to create something to use in my classroom. Before I go on, let me explain what exactly I’m talking about. I got my Makey Makey kit a few weeks ago. I ordered it online and it came within a week. As soon as I got it I started playing around with it. As I did I learned it plugged into my computer with a usb. Then you hook up colored cords that have alligator clips on the ends to different things and they will perform various functions like moving left, right, up, down, clicking or using the space bar. What’s fun about it is that you can try different objects to see what works. Things like fruit, vegetables, foil, even people work! What happens is that you complete a circuit and an action is performed. I tried hooking it up to swedish fish to see if I could use it to play the piano….it did not work very well. So instead I played the piano by just touching each clip. It’s pretty fun once you get the hang of it!
Part of my assignment was not only to use my Makey Makey kit to create something but to make it using repurposed materials. This part was the most tricky for me because I really had to think creatively. As I was thinking about what exactly my kindergarten students could do, I wanted to make sure it was something user friendly to them. After doing some research on websites like Makey Makey’s How To Guide and Lifelong Kindergarten I started to get some ideas. Once I saw this video I knew I had an idea. Seeing the Makey Makey kit used in so many different ways with students got my mind going. So I searched around my house to find something and lo and behold I saw a set of pie tins that had been purchased but never used! I mean, I GUESS that homemade pie can wait… 🙂 I thought the pie tins would be perfect because not only will they conduct electricity well but they are large enough for my students to use and be successful with. I also thought about how it’s the beginning of the year and about skills my students need to work on and learn. Working together, or collaborating, is a big skill in kindergarten. I found a game called Road Rally on www.abcya.com. You have to move the car left and right to gain coins and fuel. You can also jump. I came up with students having to collaborate to control the game. In order to gain coins and get fuel they have to communicate and work together to work the controls. You can view the lesson here.
How to Use Road Rally with Makey Makey
Materials: Makey Makey kit, 3 pie tins and a computer with internet access
Step 1: Purchase a Makey Makey kit for around $50
Step 2: Open Makey Makey kit and be sure you have all of the cords: 1 orange USB cable, 7 cords with alligator clips in various colors and 6 white connector wires
Step 3: Plug the small end of the orange USB cable into the Makey Makey and the other end into your computer. Ignore any pop ups that come up! You can just close them! Your Makey Makey should be lighting up.

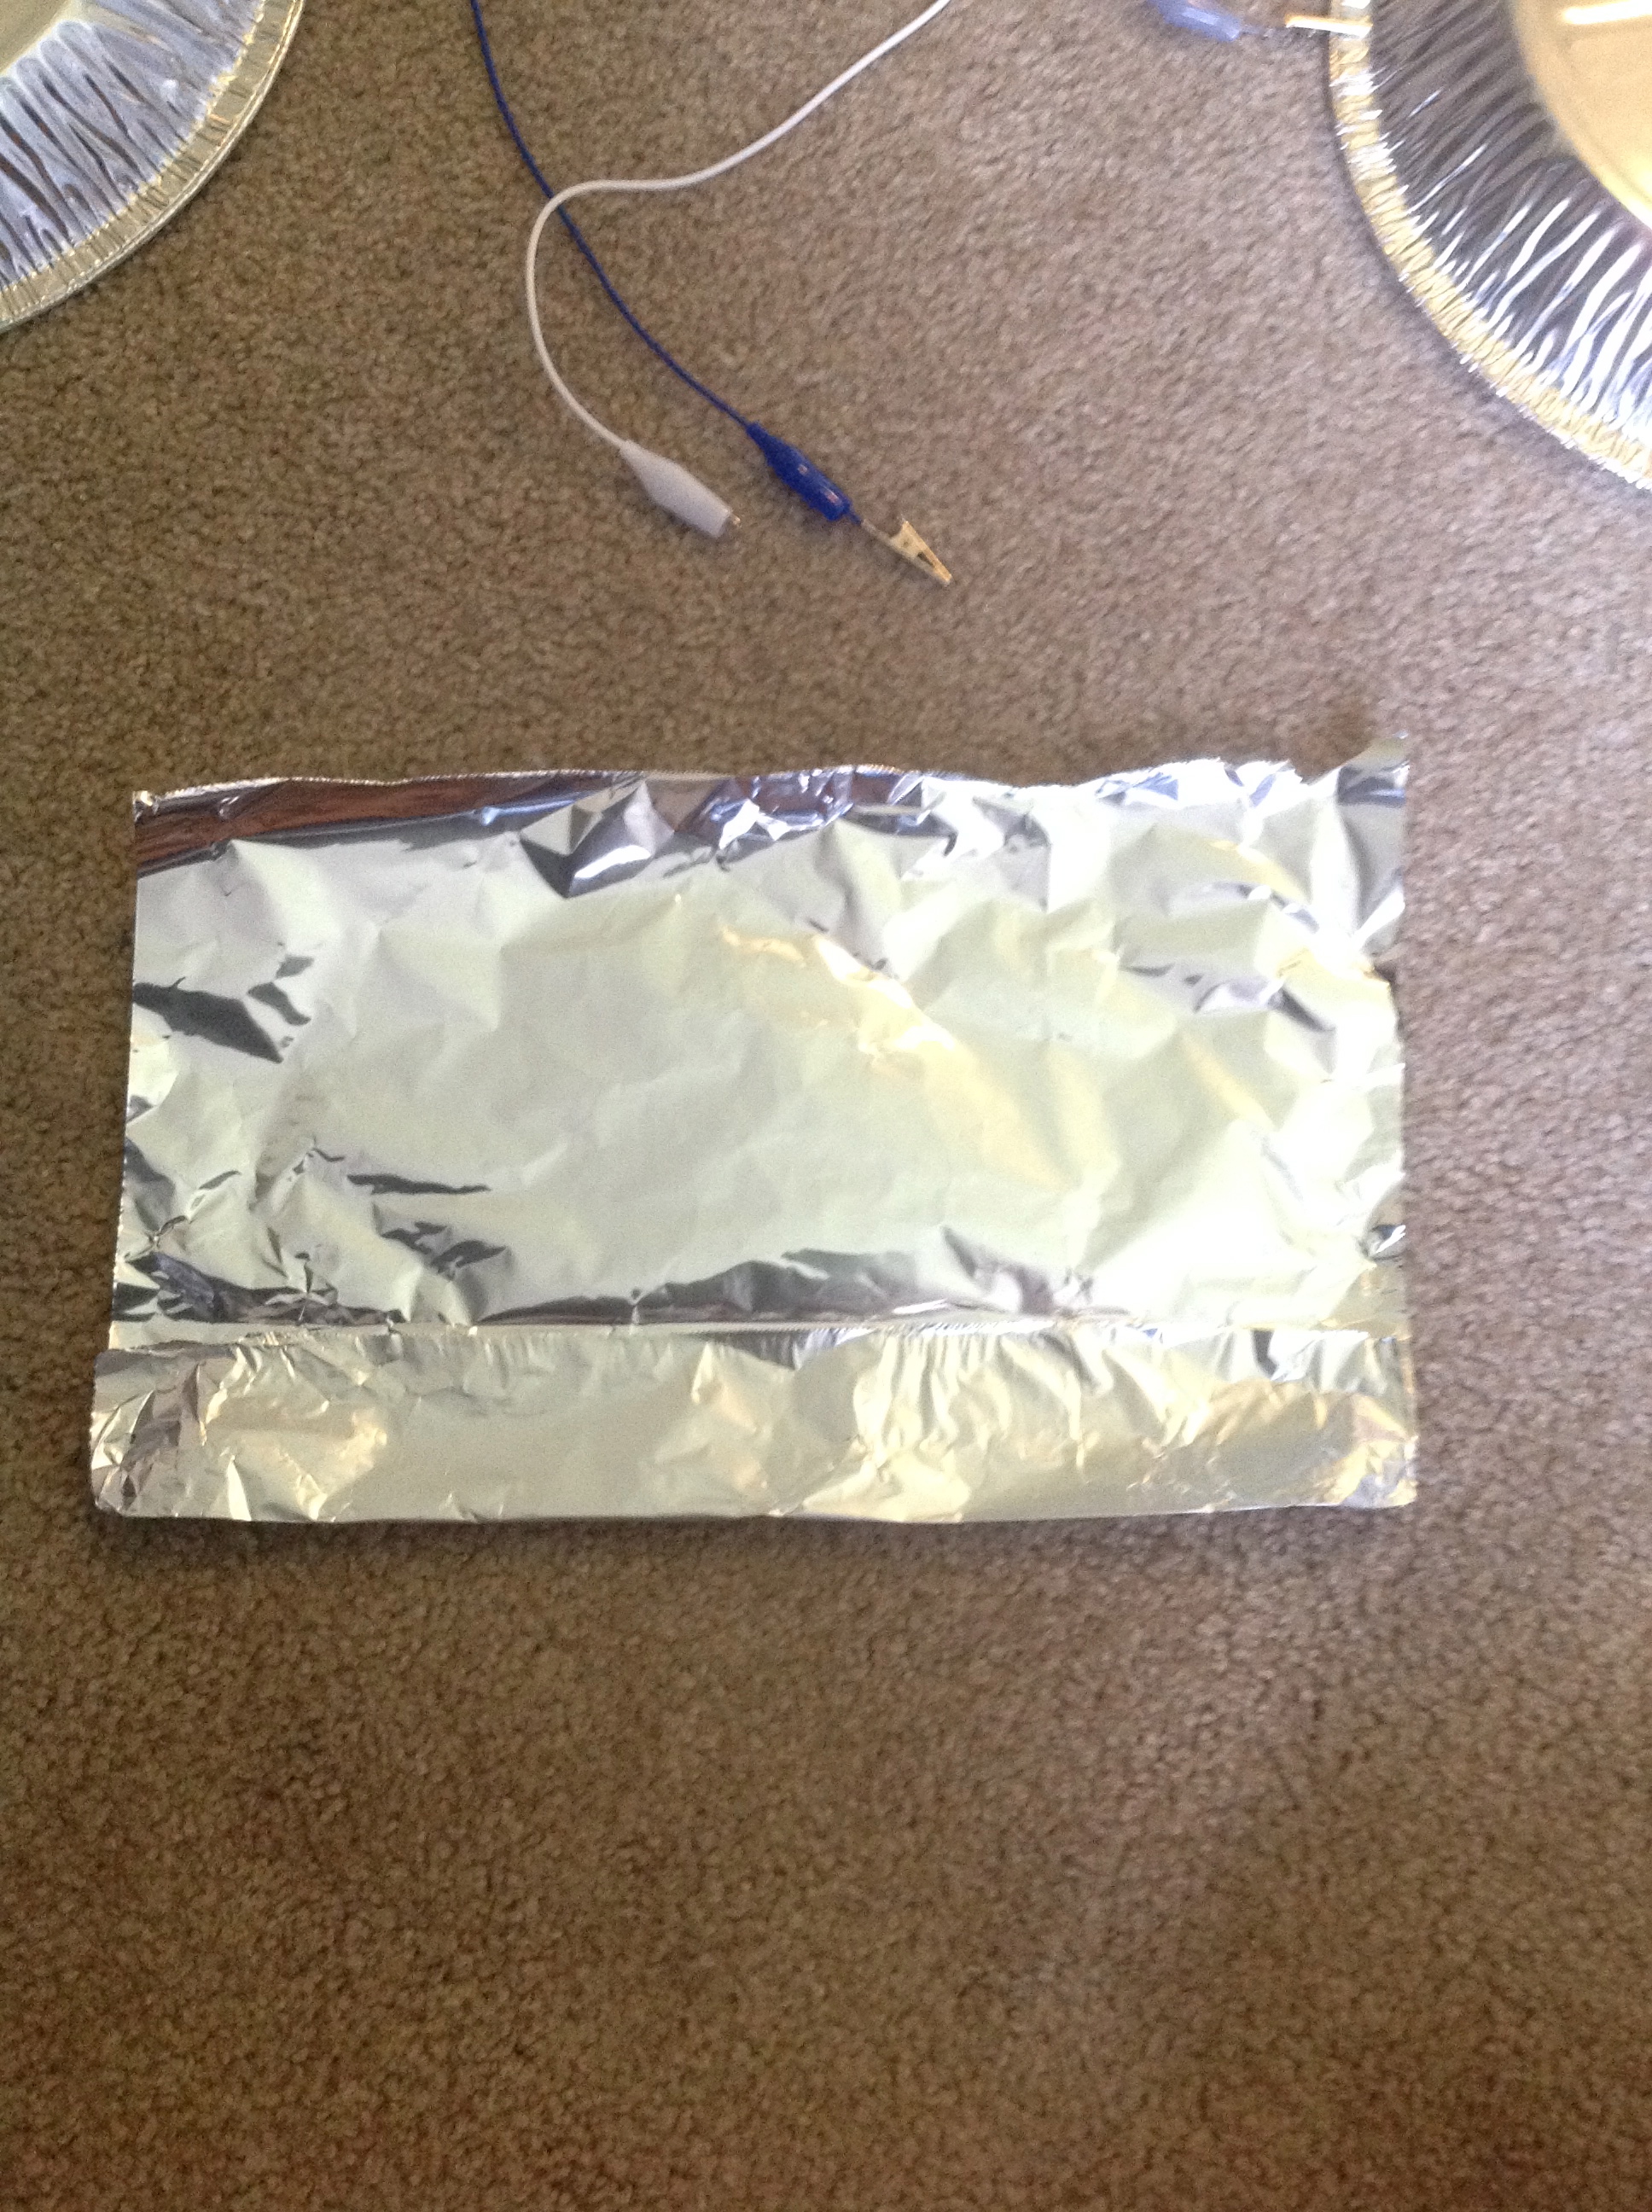
Step 4: Then start connecting the colored cords with alligator clips to your Makey Makey. You will need one connected to the left arrow, the right arrow, and the space.

Step 5: Then connect another colored cord with an alligator clip to “Earth” (at the bottom of your Makey Makey). It doesn’t matter which one. (This is the one that will be attached to you so you complete the circuit and are able to use the pie tins as controls.) Since this activity will be used with partners you need to repeat this step. You will have 2 cords connected to “Earth”. I placed mine on different ends so they wouldn’t get tangled when playing.

Step 6: Connect the alligator clip that’s clipped to the left arrow to a pie pan. Then connect the alligator clip that’s clipped to the right arrow to a pie pan. Do the same thing for the space. You should have 3 pie pan connected to your Makey Makey! (Note: You can draw or tape on arrows for what each pie plate will do, but this is not required. This will help my students to remember!)

Step 7: Take a small piece of foil and start folding it to make it a bracelet. Wrap it around your wrist and attach the alligator clip that’s clipped onto “Earth” to your bracelet. This allows for the circuit to be completed while you can use the controls with both hands.


Step 8: Bring up Road Rally from http://www.abcya.com on your computer.
Step 9: Play and have fun!
Here’s a demonstration and explanation at how this works!
The multimodal elements in my work add meaning because other teachers who may be attempting this same lesson, or something similar, can use the images and video to help guide them along. The images show exactly how to use Makey Makey in this particular lesson and the video demonstrates it as well. As a teacher I find it very valuable to have how to’s with not only step by step directions but with pictures/videos demonstrating. It helps me know that what I’m doing is correct.
References
Lifelong Kindergarten (2012). Makey Makey. Retrieved from http://llk.media.mit.edu/projects/3428/.
MakeyMakey Quick Start Guide. (2012). Retrieved from http://www.makeymakey.com/howto.php
Tom Heck (2014). DIY Assistive Technology [Video File]. Retrieved from https://www.youtube.com/watch?v=dln_5kYDU00
